The energy inefficiency of existing housing stock in the UK is a well-documented issue that continues to pose a challenge to today’s contractors, homeowners and residents.
The Government’s recently published response to the ‘Energy Company Obligation: ECO3, 2018 to 2022’ consultation process sets out their strategy for tackling issues around the energy inefficiency of our buildings, and clearly identifies retrofitted insulation as part of the solution:
“One of the best long-term solutions to address fuel poverty is by dealing with the fabric of the property through insulation, as this increases comfort and reduces heating requirements.”
External walls account for approximately 1/3 of the total heat loss of an inadequately insulated home. Choosing the right external wall insulation will depend on the type of wall you have. Houses built in the UK before 1919 are likely to have solid external walls while those built later usually incorporate cavity walls. One way to confirm this is to measure the thickness of your brick wall at an opening: if it is less than 260mm thick it is probably a solid wall, while greater than 260mm usually indicates a cavity wall.
There are many methods for insulating external walls, each with their own advantages and disadvantages.
Cavity walls can have insulation blown in to fill the gap between the inner and outer leaves. Installers do this by drilling small holes at regular intervals around the outside of the building. They then blow the insulation into the cavity using special equipment, sealing the holes when they are finished.
The benefits of blown cavity wall insulation are that the process is very clean, non-obtrusive and fast – an experienced installer can often complete the job on an average-sized house with easily accessible walls within 2 hours. However, cavity wall insulation that is poorly installed, is unsuitable for the wall type, or where wall defects are not also addressed can result in damp issues, mould & mildew growth, and even structural damage. It would be recommended to approach the NIA for approved installers in this case.
External solid walls lose more heat than cavity walls and are generally more expensive to insulate. The cost savings of retrofitting insulation on a solid wall, however, will have a greater benefit to your heating bill.
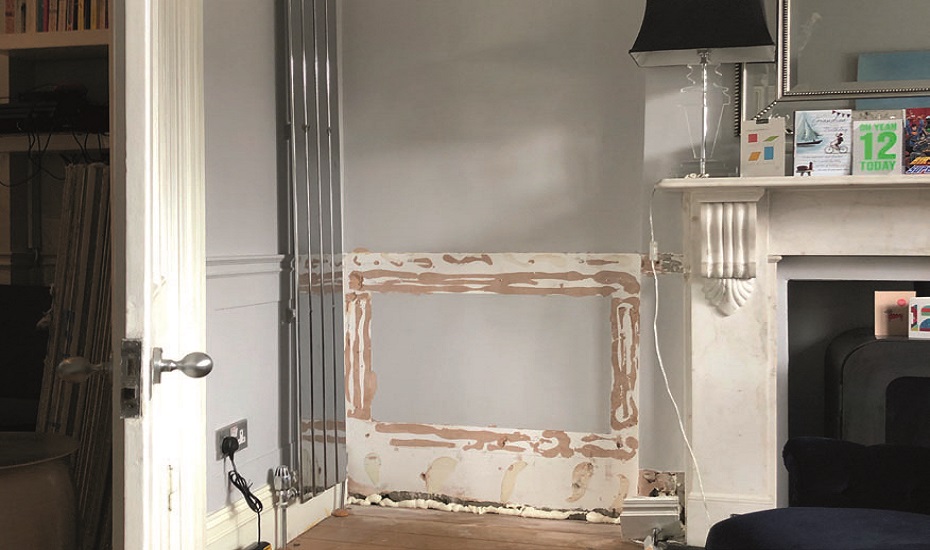
Solid walls can be insulated internally or externally. The internal method involves fixing insulation boards or panels directly onto the wall or by building a secondary stud frame against the wall then filling with an insulation material.
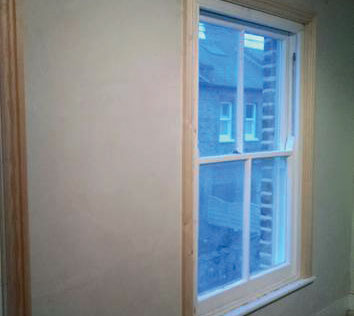
Adding insulation internally is usually less expensive than external insulation, can be installed room-by-room to minimise disruption, and is less intensive i.e.: no scaffolding is required. However, internal insulation will slightly reduce the floor area of the room it is installed in and may require a higher level of detailing, for example repositioning electrical outlets, radiators, skirting boards and window trim.
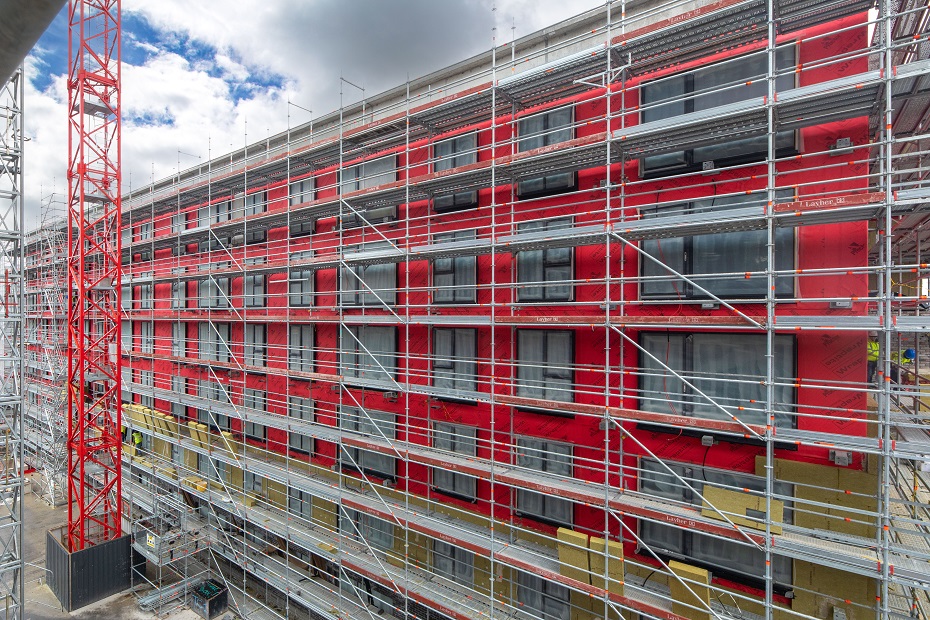
Insulating externally involves fixing insulation material onto the outside walls of a building then covering with an appropriate external render or cladding. External insulation can be installed with minimum disruption to the household, does not reduce interior living space, and renews the external appearance of your building. In most cases, however, external insulation will be the most expensive option because it requires an intensive worksite (i.e. scaffolding) as well as potentially the need for planning permission, engineering analysis and remedial work to the external walls before insulation is installed. External insulation allows the homeowner to use the thermal mass of their solid wall but this is not suitable for all occupancy types.
Despite the pros and cons of the available installation methods, the overall benefits of improved energy efficiency and reduction in heating costs makes whether to retrofit wall insulation a simple choice. It is best practice to have your walls first assessed by a qualified surveyor and to have your insulation installed by a licenced professional i.e. NIA member.
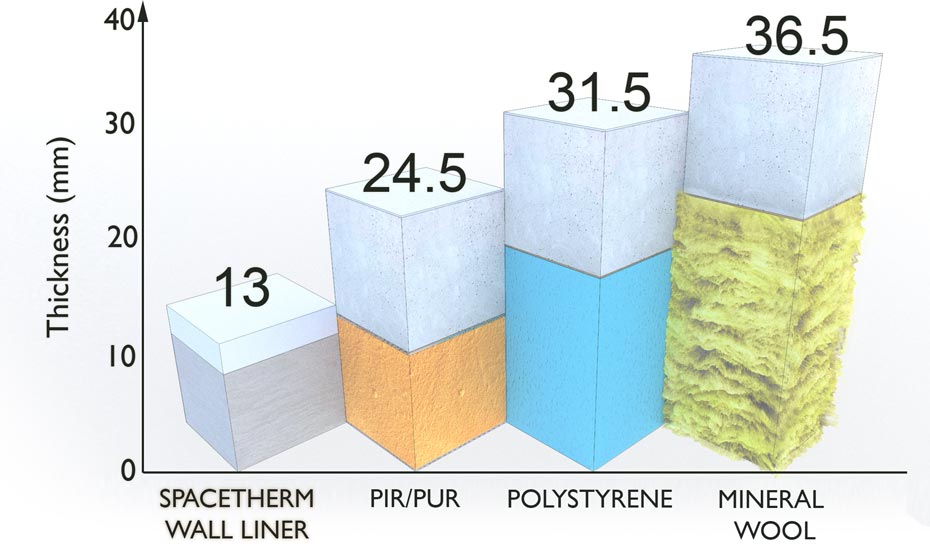
Spacetherm® Wall Liner (WL) is a 10mm aerogel insulation laminated to a 3mm MgO board that is used to insulate solid or cavity walls internally, taking up the minimum amount of internal space and allowing your walls to breathe.
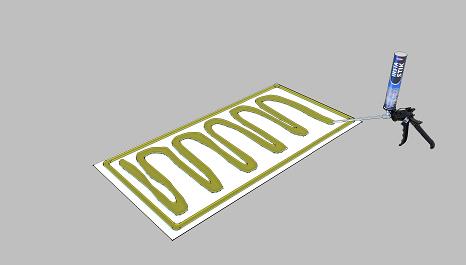
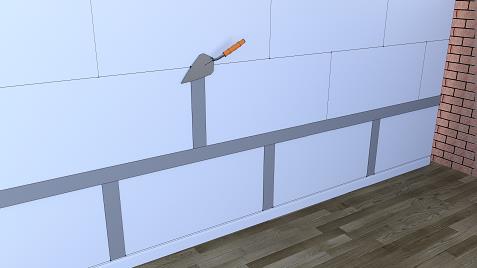
1. Spacetherm WL panels are fixed directly to the wall using Insta-stik foam. Mechanical fixings are not required.
2. Starting from a bottom corner of the wall, gently press the panel against the wall, holding until sufficient contact. Continue installing panels in this manner, either staggered or in-line.
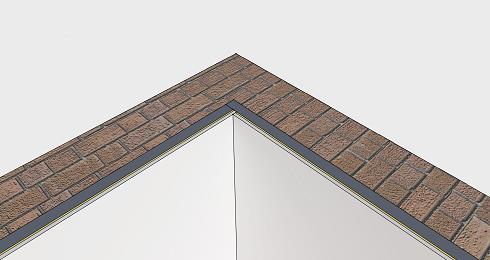
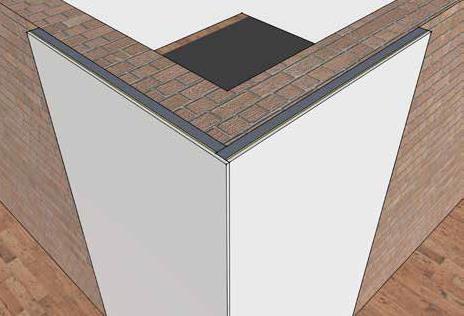
3. At corners, Spacetherm WL panels should be installed in such a way that the insulation layer overlaps to prevent a cold bridge at the junction.

4. Joints between panels are taped and filled with a gypsum-based jointing compound. Where the wall is noticeably uneven, a skim plaster finish can be used over the panels to level the surface.
5. Apply a single coat of MgO board primer and allow to dry. Primed Spacetherm WL can accept all typical interior finishes including paint, wallpaper and tile.
Related Projects
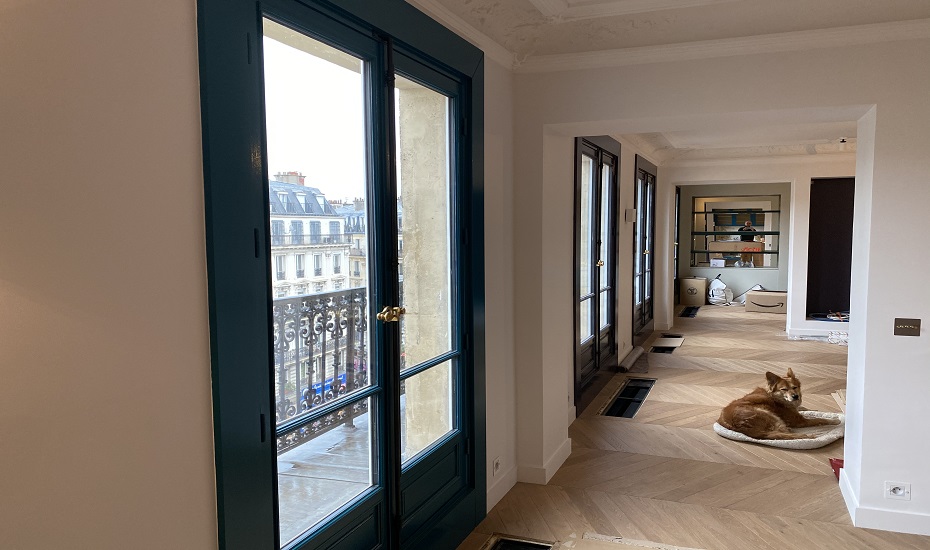
Spacetherm WL – Paris
Spacetherm® WL – London SE22
Spacetherm WL – SE London